Getting Started with Your VPS Server
A brief guide to setting up your new VPS server. Useful for both beginners and experienced users.
Just starting with your new server? This guide will help you configure and secure your server — whether you're new to servers or not. And if you're an experienced user, you still might find something useful here!
Install Ubuntu for Simplicity and Reliability
Using the latest Ubuntu LTS (Long-Term Support) version is a reliable way to ensure stable and secure operation of your project. This guide explains how to install Ubuntu OS on a VPS server hosted with us.
If You Plan to Order a New Server
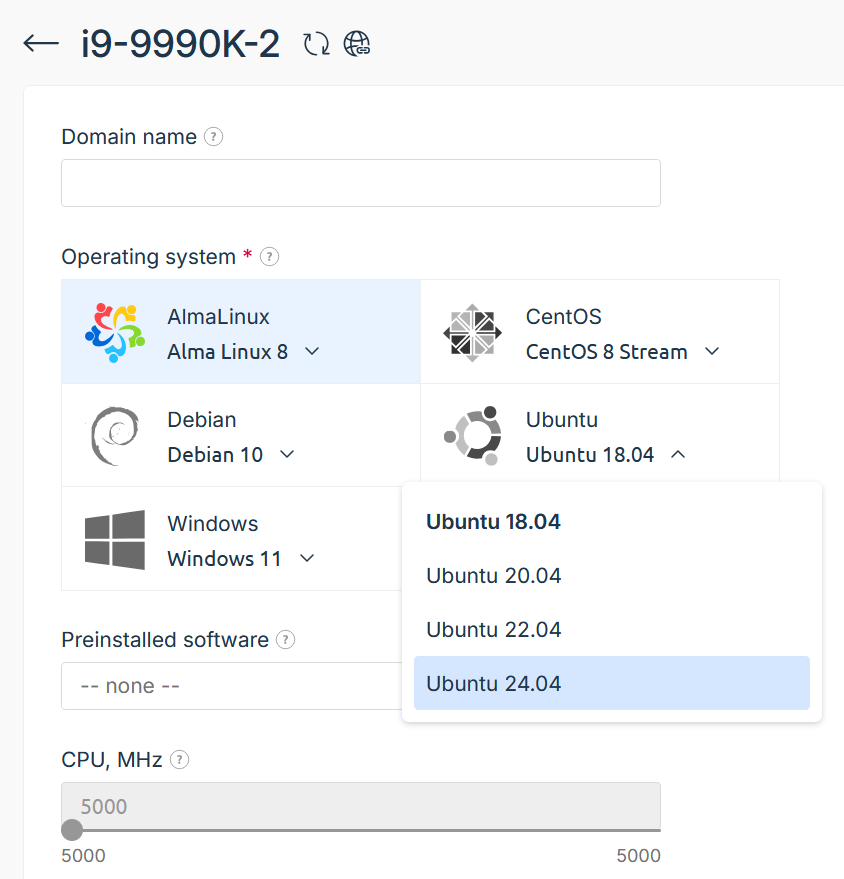
When ordering a new server, you'll have the option to choose the operating system for your new server.
Click on the OS selection dropdown and choose the latest available Ubuntu version:
You can then continue with the ordering and payment process.
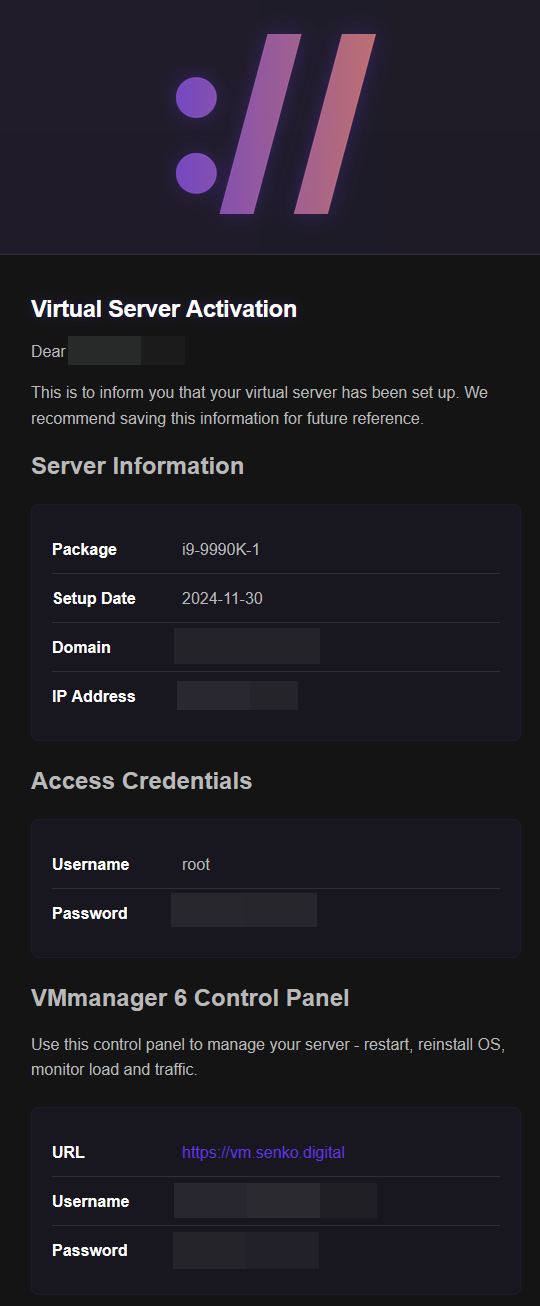
After your server is activated, you'll receive the SSH login credentials:
If You Already Have an Active Server
In this case, you'll need to reinstall the OS if Ubuntu isn't already installed on your server.
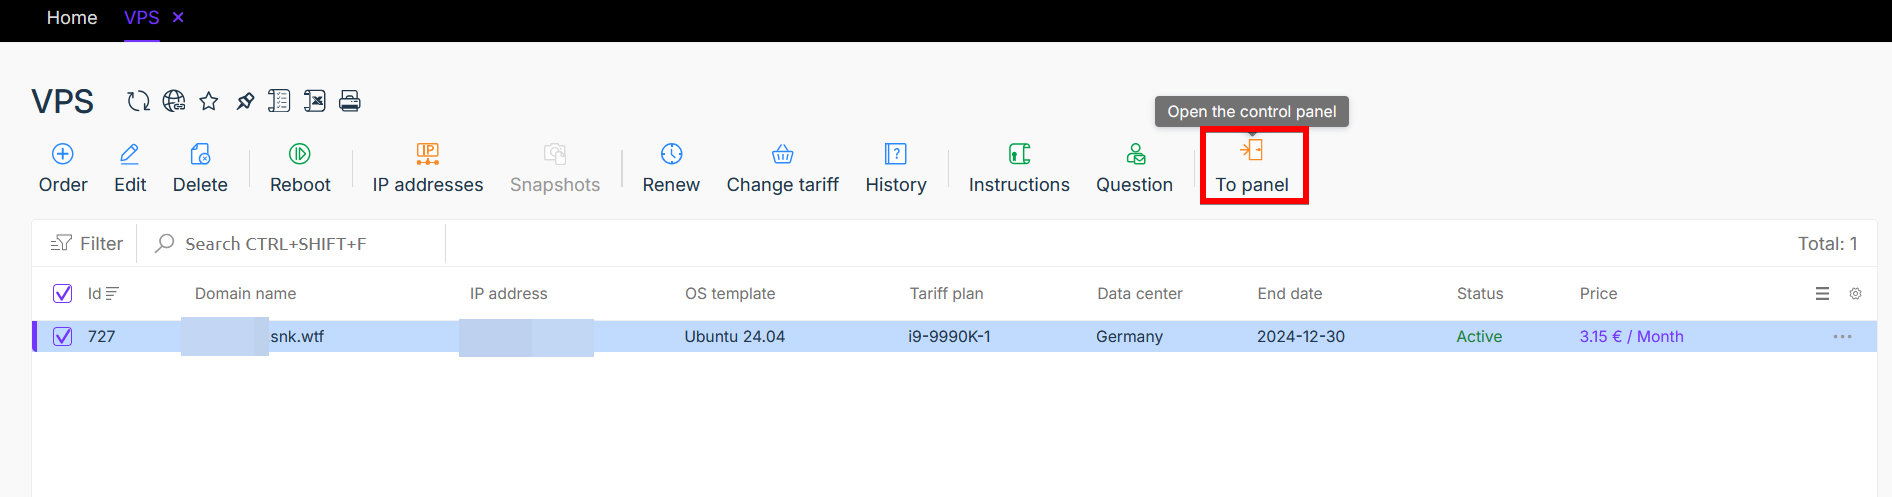
You'll need to access the virtual server control panel. The easiest way is through your account dashboard. Go to the server list using the side menu, select any server, and click the "To panel" button:
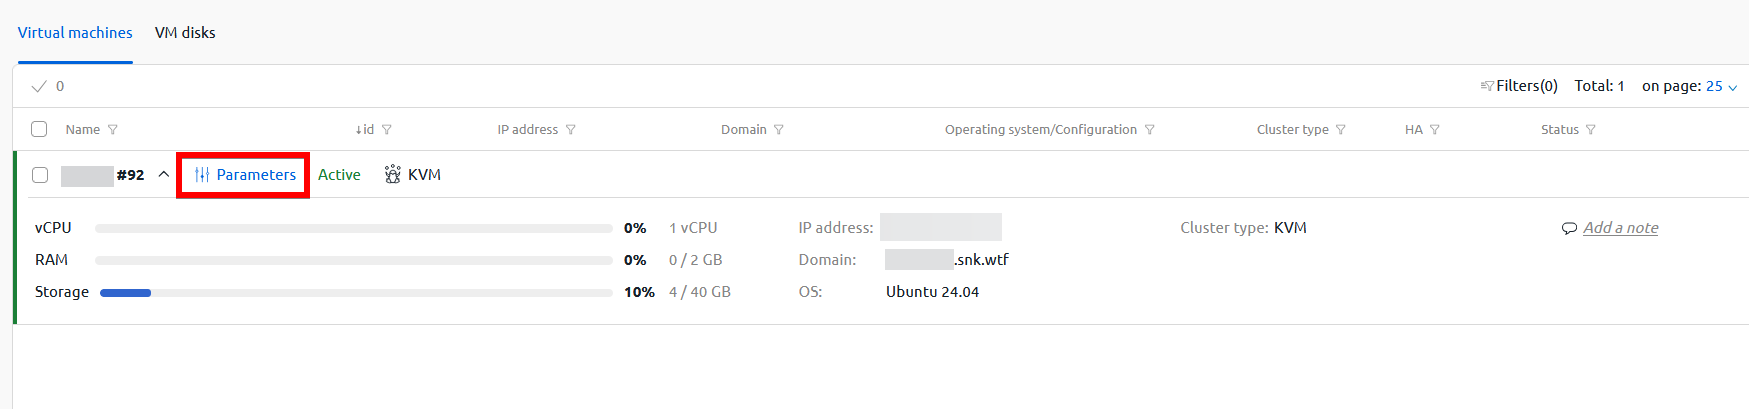
In the opened window, select your server and click on the settings button:
Then expand the menu and select "Reinstall OS":
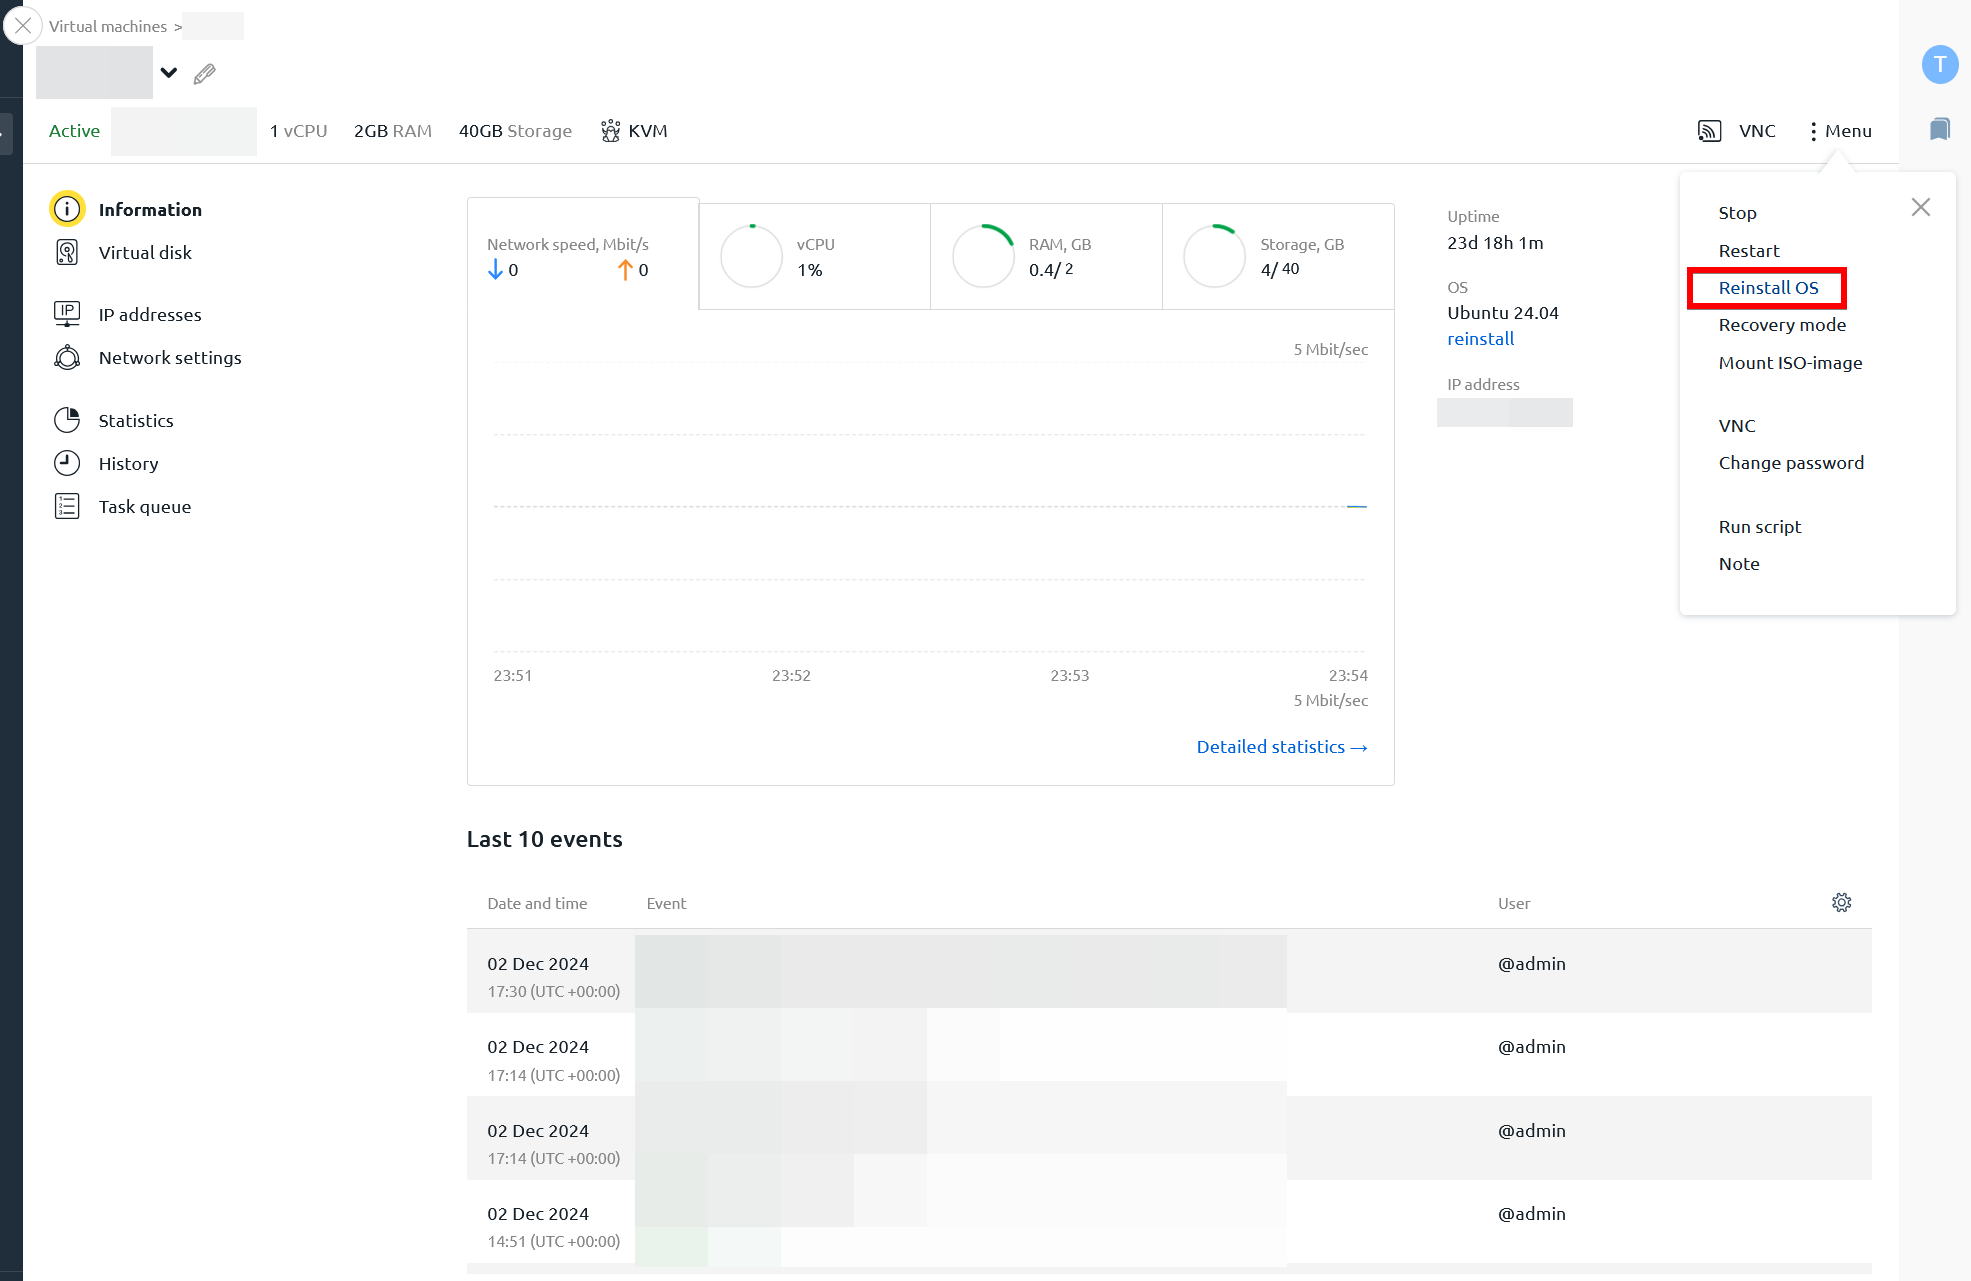
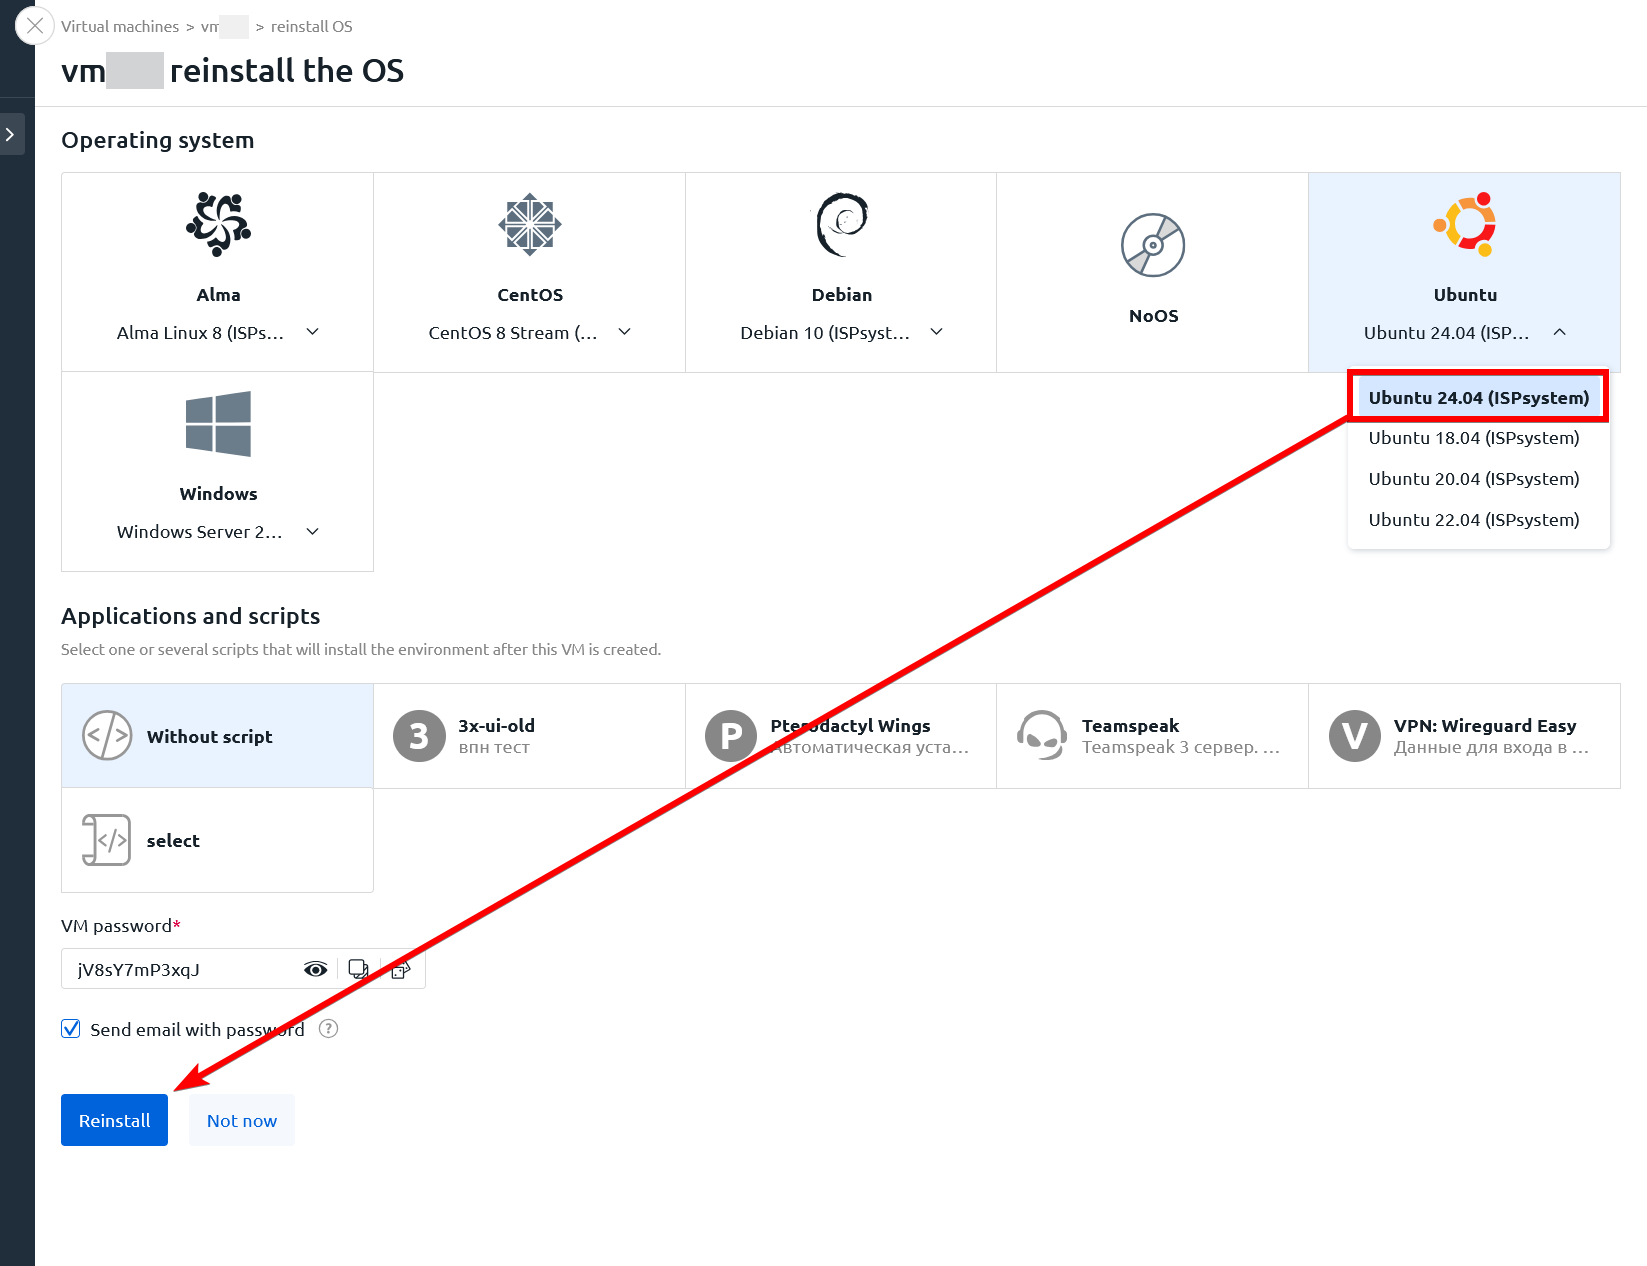
Choose the latest available Ubuntu version, enter your preferred password (or use the generated one), select any software scripts you'd like to install (if needed), and click "Reinstall".
ВНИМАНИЕ
When reinstalling the OS, all data on the server will be deleted. This action is irreversible, and the data cannot be recovered. We recommend checking that important data from the server is saved locally or in the cloud to avoid losing important information.
Setting Up Firewall with UFW
Uncomplicated Firewall (UFW) is a convenient tool for managing network access to your server.
Set it up as follows:
Make sure UFW is installed:
bashsudo apt install ufwAllow SSH connections:
bashsudo ufw allow OpenSSHEnable UFW:
bashsudo ufw enableCheck status (if it's enabled)
bashsudo ufw status
If ufw responds:
root@servername:~# ufw status
Status: active
Then the firewall is working and blocking connections to unauthorized ports.
If you plan to host a web server, game server, or any other application that needs internet access, you can allow connections to a port using:
ufw allow [port]For example:
ufw allow 80This will open port 80 for your web server.
Creating a New User Instead of Root
Working as root is unsafe. Instead of using the root user, let's create a new user and give them superuser privileges.
Creating a New User
From the root user, enter:
sudo adduser usernameReplace username with your new user's name.
When creating the user, you'll need to enter a password - it's recommended to use a password with at least 8 characters, 1 number, and 1 special character - this makes it much harder to crack.
ПОДСКАЗКА
The utility will also ask for optional information like Full Name, Room Number, Work Phone, Home Phone, and other details.
This data is optional, and you can skip it by pressing [Enter] until you reach the confirmation dialog.
After entering all the data, the utility will ask if you want to create the new user.
If you entered everything as needed - confirm by pressing [Y].
Granting sudo Rights to the User
To give superuser privileges to your new user, use:
sudo usermod -aG sudo usernameDone! Now you can log in as your new user with:
sudo loginDisabling Root SSH Access
To increase security, disable root login:
Edit the SSH configuration:
bashsudo nano /etc/ssh/sshd_configFind and change the
PermitRootLoginparameter tono:bashPermitRootLogin noSave the changes. Do this by pressing
[CTRL]+[X], then[Y], and[Enter].Restart the SSH service:
bashsudo systemctl restart sshd
Using SSH Keys Instead of Password
SSH keys provide more secure authentication, replacing passwords with a long private key for authentication.
Keys are stored locally on your PC and can be used by various applications, including SSH clients and Visual Studio Code.
To set up key-based login, follow these steps:
Generate a New Private Key
On your PC, generate a new key pair:
ssh-keygen -t rsa -b 4096During key generation, you can specify a name for your key for easier access.
The utility will also ask for a passphrase (password) for extra security.
This step is optional but strongly recommended. If you set a key password, make sure to remember it well or write it down and keep it safe, as it cannot be changed later.
After generating the key, you should see something like this:
Your identification has been saved in test
Your public key has been saved in test.pub
The key fingerprint is:
SHA256:DdMvV6JQAZ4Xs5BO56pPfP/V5obIfiZjsaIBwlLnlTo senko@digital
The key's randomart image is:
+---[RSA 4096]----+
|        oo=.     |
|       .o*.+     |
|    . .oOo+ . .  |
|   o o o.*.o o   |
|  . o E S.+ o    |
|   . . +.  o.   .|
|       .+ .. + .+|
|      .. o..B ++.|
|       .o. +o*...|
+----[SHA256]-----+
Copy the Public Key to Your Server
ssh-copy-id username@server_ipReplace username with your user's name and server_ip with your server's IP address.
Test the Server Connection
Connect to the server using your SSH client (on Windows, you can use Termius, Bitvise SSH Client, or others), specifying your generated private key in the settings.
If Using OpenSSH
If you're using the built-in OpenSSH in Windows or Linux, follow these steps:
1. Go to the .ssh folder
In Windows, it's at C:\Users\%username%\.ssh
In Linux, it's in your home directory at /home/username/.ssh
2. Create OpenSSH Configuration File
Create a new file named config (without any extension).
If the file exists, just edit it and continue to the next step.
3. Configure OpenSSH
Add this to the config file:
Host ConnectionName
 HostName server-ip
 User username
 Port ssh-port
 IdentityFile ~/.ssh/private-key-name
ConnectionName - an alias for your connection. Examples: discord-bot, website-prod, gmod-server. Used for quick connection without typing IP and login (ssh aliasname).
server-ip - your server's IP address.
username - the username to connect with.
ssh-port - SSH port on your server.
private-key-name - name of your private key from generation
After saving, try connecting:
ssh aliasnameDisable Password Login in sshd_config
On the server, edit the file:
sudo nano /etc/ssh/sshd_configFind PasswordAuthentication and set it to no:
PasswordAuthentication noSave the changes.
Restart SSH
sudo systemctl restart sshdDone! Now password login is disabled, and you can only connect using your private key.
Regular OS Updates
Regular updates are crucial for security. Update your server and software at least weekly with:
sudo apt update && sudo apt upgrade -yMonitoring Server Load with htop
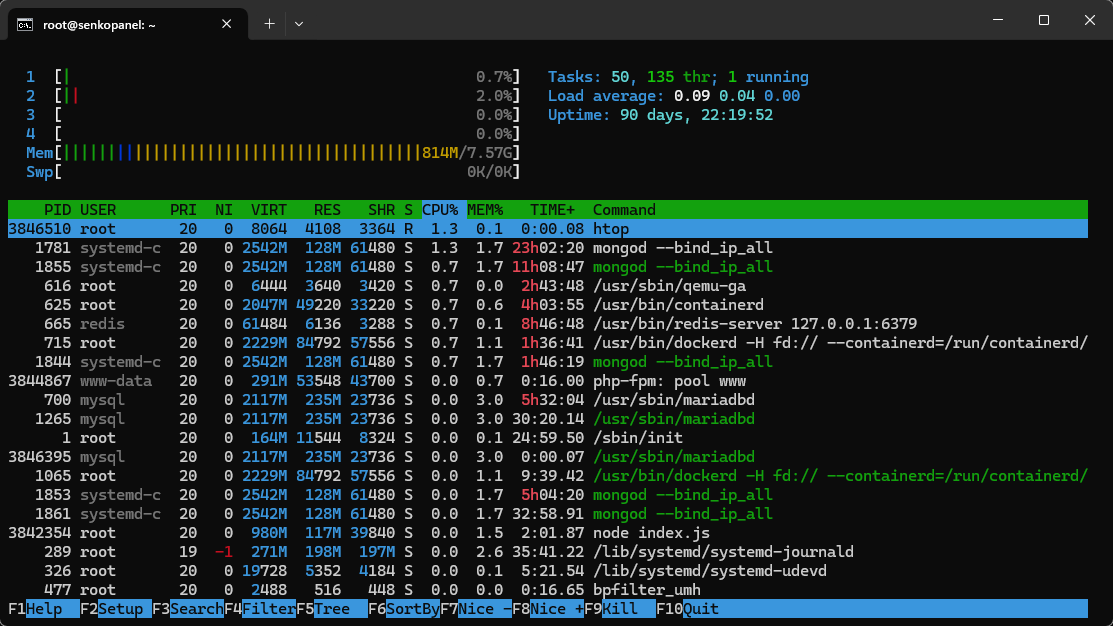
For monitoring server resources, use htop. It's similar to Task Manager in Windows.
The program shows CPU load, RAM usage, running processes, uptime, and more.
Install htop:
bashsudo apt install htopRun it:
bashhtop
Following this guide will give you a secure and reliable server ready for your tasks.
Remember to update regularly and monitor your system to keep it running smoothly.