Installing Plugins
Installing PluginsQuick guide for installing plugins on a Minecraft server.
TIP
Plugins only work with corresponding cores, such as PaperMC, CraftBukkit, Mohist, and Fabric. For complete installation instructions, visit our guide
Each plugin is created with a specific core in mind. For example, a plugin for PaperMC won't work with CraftBukkit, and vice versa. Therefore, before installation, make sure that the plugin you're going to install is compatible with your specific core.
To avoid errors and non-working plugins, use official resources for specific plugins, for example, for PaperMC it's Hangar, for CraftBukkit - Bukkit, Spigot - Spigot resources. We can also recommend Modrinth, which contains a large number of plugins for all popular cores.
Downloading Plugins
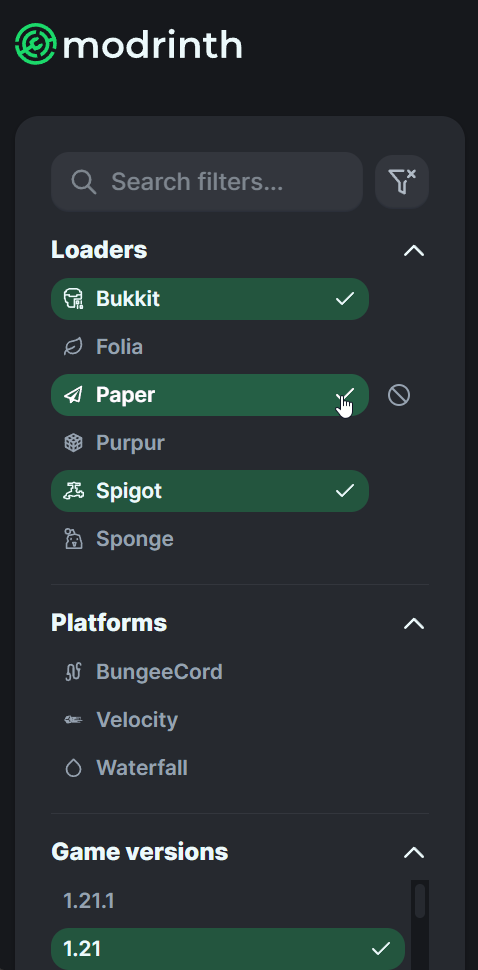
In this guide, we'll use Modrinth as an example, as we believe it's the most convenient. Let's start with the filters.
The main filters are the core (platform) and server version.
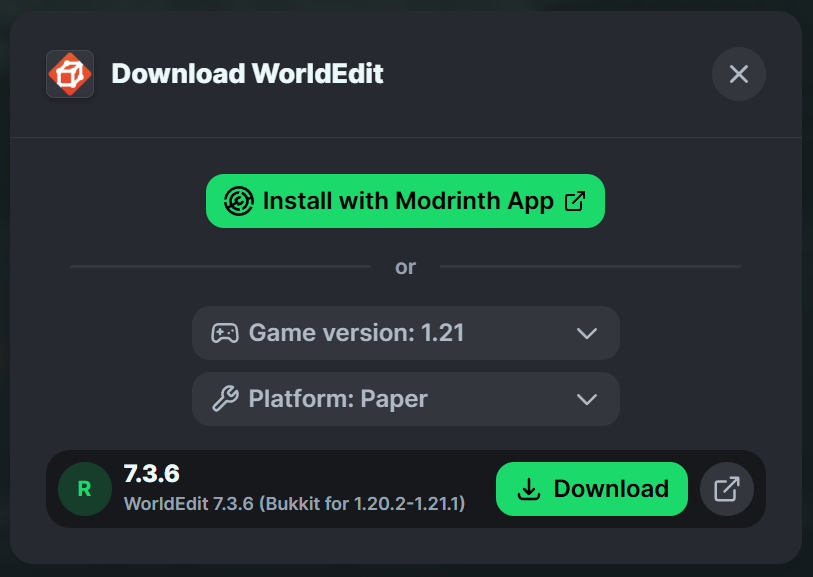
After you've selected a plugin and gone to its page, click on the "Download" button.

Next, a window will appear where you'll need to select the version and core (platform).
Installing the Plugin on the Server
After downloading the plugin, go to the server file management, then to the plugins folder, and upload the plugin file(s) there. In our case, it's worldedit-bukkit-7.3.6.jar.

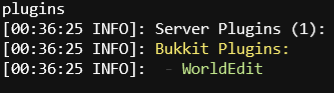
Checking Plugin Functionality
After installing the server, you need to start the server to ensure it's working properly. After that, just type the plugins command in the console. If the newly installed plugin is in the list - that means the installation was successful!