Installation and Usage Guide for 3X-UI Panel

3X-UI is a multifunctional web panel for managing VPN servers, supporting various protocols such as VMess, VLESS, Trojan, ShadowSocks, and WireGuard.
This panel provides easy management of VPN connections, configuration of multiple users, and setting limits on traffic, expiration dates, and IP addresses.
TIP
Our hosting clients have access to fully automated 3X-UI panel installation script during initial service ordering, or through scripts in the VM control panel. All that remains is to create users and configure inbounds.
3x-ui Features
- Multilingual interface (English, Persian, Chinese, Russian, Vietnamese, Spanish)
- Support for multiple protocols (VMess, VLESS, Trojan, ShadowSocks, WireGuard)
- Multiple user management
- Setting limits for traffic, expiration dates, and IP addresses
- Automatic SSL certificate management
- Intuitive web interface
- Traffic usage statistics
- Ad blocking and traffic routing capabilities
- Support for Reality technology to bypass restrictions
Installation
Automatic Installation for Hosting Clients
During Service Order
In the order menu, select "3X-UI" from the dropdown menu, complete the order and wait for service processing to finish.
Immediately after server activation, you will receive login credentials for both the server OS and 3X-UI panel. After that, you can log in and start configuring connections.
Through the VM Panel
Go to the VM control panel, navigate to the management of the desired server, expand the "Menu" in the top right corner and select "Run script".
In the dialog, select the "3X-UI" option and enable "Send email associated with script".
After installation is complete, you will receive an email with login credentials for the control panel. Then you can log in and start configuring connections.
Standard Installation
To install 3X-UI, run the following command:
bash <(curl -Ls https://raw.githubusercontent.com/mhsanaei/3x-ui/master/install.sh)During installation, you will be prompted to:
- Change panel settings (recommended to answer
yfor increased security) - Specify the panel port (recommended to use a non-standard one)
Installing a Specific Version
To install a specific version, add the version number at the end of the installation command. For example, for version v1.7.9:
VERSION=v1.7.9 && bash <(curl -Ls "https://raw.githubusercontent.com/mhsanaei/3x-ui/$VERSION/install.sh") $VERSIONDocker Installation
- Install Docker:
bash <(curl -sSL https://get.docker.com)- Clone the project repository:
git clone https://github.com/mhsanaei/3x-ui.git
cd 3x-ui- Start the service:
docker compose up -dOr alternatively:
docker run -itd \
   -e XRAY_VMESS_AEAD_FORCED=false \
   -v $PWD/db/:/etc/x-ui/ \
   -v $PWD/cert/:/root/cert/ \
   --network=host \
   --restart=unless-stopped \
   --name 3x-ui \
   ghcr.io/mhsanaei/3x-ui:latest
SSL Certificate Configuration
There are several ways to configure an SSL certificate in 3x-ui
ACME
To manage SSL certificates using ACME:
- Make sure your domain correctly points to this server (i.e., the A record in DNS is configured correctly).
- Run the
x-uicommand in the terminal, then selectSSL Certificate Management. - You will be presented with the following options:
- Get SSL: Obtain SSL certificates.
- Revoke: Revoke existing SSL certificates.
- Force Renewal: Force renewal of SSL certificates.
- Show Existing Domains: Display all domain certificates available on the server.
- Specify Certificate Paths for the Panel: Specify a certificate for your domain to be used by the control panel.
Certbot
To install and use Certbot, simply enter these commands:
apt-get install certbot -y
certbot certonly --standalone --agree-tos --register-unsafely-without-email -d yourdomain.com
certbot renew --dry-run- where
yourdomain.comis your domain
Logging into the Web Panel
After installing the control panel, follow the instructions below:
- Enter the command
x-ui - Select option
10by entering the corresponding number in the terminal.
You will be provided with login data in this format: 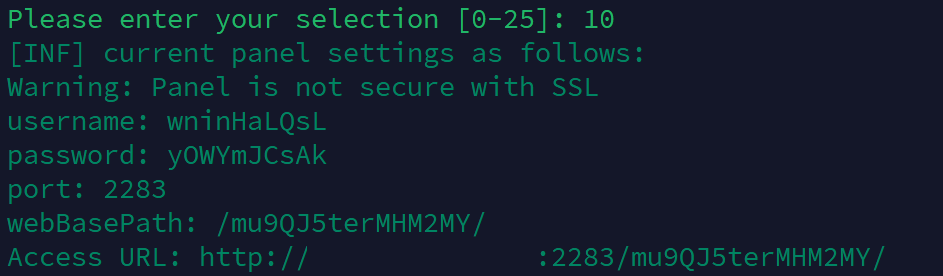
You will need to go to the link specified in Access URL and log in with your username and password
Setting Up Connections (Inbounds)
Creating a New Connection
- Go to the "Inbounds" page
- Click the "Add inbound" button to create a new connection
- In the opened window, enter any convenient name in the "Remark" field
- Select the protocol type (VMess, VLESS, Trojan, ShadowSocks, or WireGuard)
Protocol Configuration
For VLESS + Reality (recommended for bypassing restrictions):
- Select security type -
Reality - Set uTLS -
chrome - In the "Dest" field, enter a value, for example
dl.google.com:443 - In the "SNI" field, enter a value, for example
dl.google.com - Click
Get New Certto automatically generate random keys - Click the Create button to save and create the connection
Setting Limits
For each connection, you can configure:
- Traffic limit (in gigabytes)
- Expiration date (in days)
- IP address limit (number of simultaneous connections)
- Enable or disable restrictions
User Management
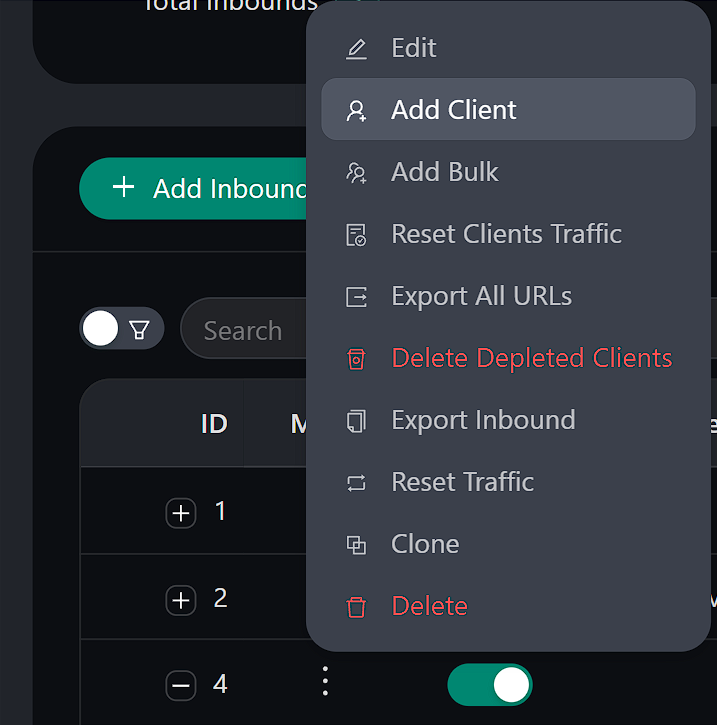
In the Inbounds section:
- To view additional settings, click the
+icon next to the created connection - To create a new user, select the "Add Client" option
- For each user, you can configure:
- Name (a name convenient for you)
- Traffic limit
- Expiration date
- Unique ID
Client Connection
Windows, macOS, and Linux
Recommended clients:
Hiddify(Windows, Linux, macOS)NekoRay(Windows, Linux)
To connect:
- In the 3X-UI web panel, click on the QR code of the desired user
- Copy the configuration or scan the QR code using a VPN client
- Import the configuration into the client and make the connection
Android
Recommended clients:
Hiddifyv2rayNG
To connect:
- Install the client from Google Play
- In the 3X-UI web panel, click on the QR code of the desired user
- Scan the QR code using the VPN client or copy and import the configuration
- Connect using the imported configuration
iOS
Recommended clients:
FoXrayv2boxShadowRocket
To connect:
- Install the client from the App Store
- In the 3X-UI web panel, click on the QR code of the desired user
- Scan the QR code using the client or copy and import the configuration
- Connect using the imported configuration
Monitoring and Statistics
In the 3X-UI web panel, you can monitor user activity:
- Total traffic consumption
- Traffic usage by user
- Connection status
- User subscription expiration dates
- IP address usage
Updating 3x-ui
To update the panel to the latest version, run the following command:
bash <(curl -Ls https://raw.githubusercontent.com/mhsanaei/3x-ui/master/install.sh)If you're using Docker, you'll need to run the following commands:
cd 3x-ui
docker compose down
docker compose pull 3x-ui
docker compose up -d
Troubleshooting
Default Settings
- Port:
2053 - Database path:
/etc/x-ui/x-ui.db - Xray configuration path:
/usr/local/x-ui/bin/config.json
Additional Xray Settings
In the web panel, you can configure additional Xray options:
- Ad blocking
- Blocking IP addresses from specific countries
- Domain blocking
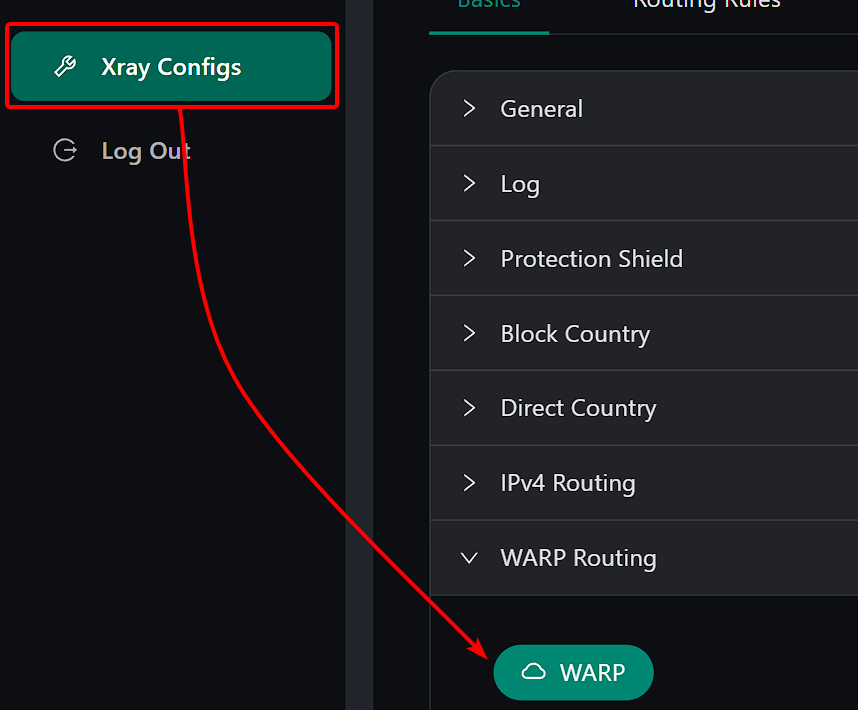
- Routing Google, Netflix, Spotify, OpenAI (ChatGPT) through WARP
WARP Configuration
For versions v2.1.0 and later - WARP is built-in and does not require additional installation.
Simply enable the desired configuration in the panel.