WireGuard VPN Installation Guide
![]()
WireGuard is a modern, fast, and secure VPN protocol that's easy to configure and deploy. This guide will walk you through installing and configuring WireGuard on your server to create a secure VPN connection.
TIP
Our hosting clients have access to a fully automated WireGuard installation script during initial service ordering, or through scripts in the VM control panel.
Prerequisites
Before starting, ensure you have:
- A server running a supported Linux distribution (Debian/Ubuntu, RHEL/CentOS/AlmaLinux/Rocky/Fedora)
- Root or sudo access to the server
- Basic knowledge of command line operations
- The server's public IP address
Installation
Automatic Installation for Hosting Clients
During Service Order
In the order menu, select "WireGuard" from the dropdown menu, complete the order and wait for service processing to finish.
Immediately after server activation, you will receive an email containing your WireGuard configuration file and instructions for connecting. The configuration file can be imported directly into any WireGuard client application.
Through the VM Panel
Go to the VM control panel, navigate to the management of the desired server, expand the "Menu" in the top right corner and select "Run script".
In the dialog, select the "WireGuard" option and enable "Send email associated with script".
After installation is complete, you will receive an email with your WireGuard configuration file and connection instructions. Simply import the configuration file into your WireGuard client to start using the VPN.
Manual Installation
The installation process varies depending on your Linux distribution. Make sure to use the correct commands for the installation process.
# Update package list
apt-get update -y

# Install WireGuard and required tools
apt-get install -y wireguard wireguard-tools iproute2 iptables# Install EPEL repository (if not already installed)
yum install -y epel-release
# OR for newer systems:
dnf install -y epel-release
# Install WireGuard and required tools
yum install -y wireguard-tools iproute iptables
# OR for newer systems:
dnf install -y wireguard-tools iproute iptablesServer Configuration
1. Create Directory Structure
First, create the necessary directories for storing WireGuard configuration files:
# Set secure permissions
umask 077

# Create directories for server and client configurations
mkdir -p /etc/wireguard/server
mkdir -p /etc/wireguard/client
2. Generate Cryptographic Keys
WireGuard uses public-key cryptography. Generate key pairs for both server and client:
# Generate server keys
wg genkey | tee /etc/wireguard/server/privatekey | wg pubkey > /etc/wireguard/server/publickey

# Generate client keys
wg genkey | tee /etc/wireguard/client/privatekey | wg pubkey > /etc/wireguard/client/publickey
3. Plan Network Parameters
Identify your default network interface and choose addressing parameters:
- Network interface: Find it with
ip route get 1.1.1.1 | awk '{print $5; exit}'or inspectip route(commonlyeth0orens3) - Server public IP: Confirm via
curl -4 ifconfig.ioor in the personal area - VPN subnet: Choose a private subnet that does not conflict with your existing networks, e.g.,
10.8.0.0/24(use10.9.0.0/24or another RFC1918 range if10.8.0.0/24conflicts) - Server VPN address: Use the first usable IP in the chosen subnet, e.g.,
10.8.0.1/24 - Client VPN address: Assign a unique IP per client, e.g.,
10.8.0.2/24 - Port:
51820/udpby default (you may choose a different UDP port)
4. Enable IP Forwarding
Enable IP forwarding to allow the server to route traffic between the VPN and the internet:
# Enable IP forwarding temporarily
sysctl -w net.ipv4.ip_forward=1
sysctl -w net.ipv6.conf.all.forwarding=1

# Apply changes
sysctl -p

# Make the change permanent
echo 'net.ipv4.ip_forward=1' > /etc/sysctl.d/99-wireguard-forwarding.conf
echo 'net.ipv6.conf.all.forwarding=1' >> /etc/sysctl.d/99-wireguard-forwarding.conf
5. Create Server Configuration
Create the main WireGuard configuration file at /etc/wireguard/wg0.conf:
[Interface]
Address = 10.8.0.1/24
ListenPort = 51820
PrivateKey = [SERVER_PRIVATE_KEY]
PostUp = iptables -t nat -A POSTROUTING -s 10.8.0.0/24 -o [INTERFACE] -j MASQUERADE; iptables -A FORWARD -i %i -o [INTERFACE] -j ACCEPT; iptables -A FORWARD -i [INTERFACE] -o %i -m state --state RELATED,ESTABLISHED -j ACCEPT
PostDown = iptables -t nat -D POSTROUTING -s 10.8.0.0/24 -o [INTERFACE] -j MASQUERADE; iptables -D FORWARD -i %i -o [INTERFACE] -j ACCEPT; iptables -D FORWARD -i [INTERFACE] -o %i -m state --state RELATED,ESTABLISHED -j ACCEPT

[Peer]
PublicKey = [CLIENT_PUBLIC_KEY]
AllowedIPs = 10.8.0.2/32Important: Replace the placeholders:
[SERVER_PRIVATE_KEY]: Content of/etc/wireguard/server/privatekey[CLIENT_PUBLIC_KEY]: Content of/etc/wireguard/client/publickey[INTERFACE]: Your server's network interface (e.g.,eth0,ens3)
Set secure permissions on the configuration file:
chmod 600 /etc/wireguard/wg0.confClient Configuration
Create a client configuration file at /etc/wireguard/client/client.conf:
[Interface]
PrivateKey = [CLIENT_PRIVATE_KEY]
Address = 10.8.0.2/24
DNS = 1.1.1.1, 1.0.0.1

[Peer]
PublicKey = [SERVER_PUBLIC_KEY]
AllowedIPs = 0.0.0.0/0, ::/0
Endpoint = [SERVER_IP]:51820
PersistentKeepalive = 25
Replace the placeholders:
[CLIENT_PRIVATE_KEY]: Content of/etc/wireguard/client/privatekey[SERVER_PUBLIC_KEY]: Content of/etc/wireguard/server/publickey[SERVER_IP]: Your server's public IP address
Set secure permissions:
chmod 600 /etc/wireguard/client/client.confStarting the VPN
Enable and Start WireGuard Service
# Enable WireGuard to start automatically on boot
systemctl enable wg-quick@wg0

# Start the WireGuard service
systemctl start wg-quick@wg0
Alternative method using wg-quick:
# Start WireGuard interface
wg-quick up wg0

# Stop WireGuard interface
wg-quick down wg0
Verification
Check WireGuard Status
# Check if WireGuard is running
systemctl status wg-quick@wg0

# View WireGuard interface details
wg show

# Check network interfaces
ip addr show wg0
Test the VPN Connection
- Copy the client configuration to your client device
- Install WireGuard client on your device
- Import the configuration file
- Connect to the VPN
- Verify your IP address has changed to your server's IP
Firewall Configuration
If you're using a firewall (like ufw or firewalld), make sure to allow WireGuard traffic:
For UFW (Ubuntu/Debian):
# Allow WireGuard port
ufw allow 51820/udp

# Allow forwarding (if needed)
ufw route allow in on wg0 out on eth0
For firewalld (RHEL/CentOS):
# Allow WireGuard port
firewall-cmd --permanent --add-port=51820/udp
firewall-cmd --reload

# Enable masquerading
firewall-cmd --permanent --add-masquerade
firewall-cmd --reload
Adding Additional Clients
To add more clients to your WireGuard server:
Create client directory:
bashmkdir -p /etc/wireguard/client2 chmod 700 /etc/wireguard/client2Generate a new key pair for the new client:
bashwg genkey | tee /etc/wireguard/client2/privatekey | wg pubkey > /etc/wireguard/client2/publickeyAdd new peer section to
/etc/wireguard/wg0.conf:ini[Peer] PublicKey = [CLIENT2_PUBLIC_KEY] AllowedIPs = 10.8.0.3/32Reload WireGuard configuration:
bashsystemctl reload wg-quick@wg0
Installing WireGuard Client
Windows Installation
- Go to the official website wireguard.com and download the Windows installer

- Run the downloaded file and follow the installation wizard
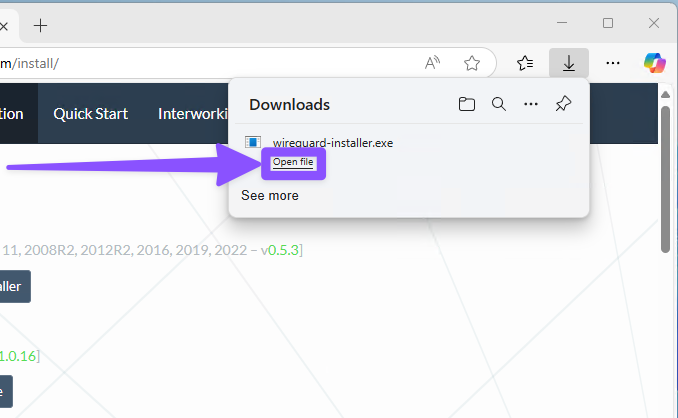
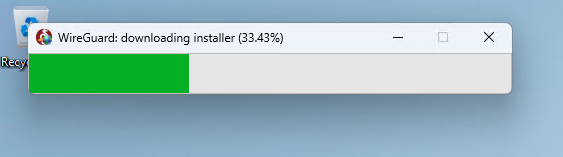
The application will launch automatically after installation.
- Import your configuration file into the application
- Start the VPN connection
Click the "Activate" button.
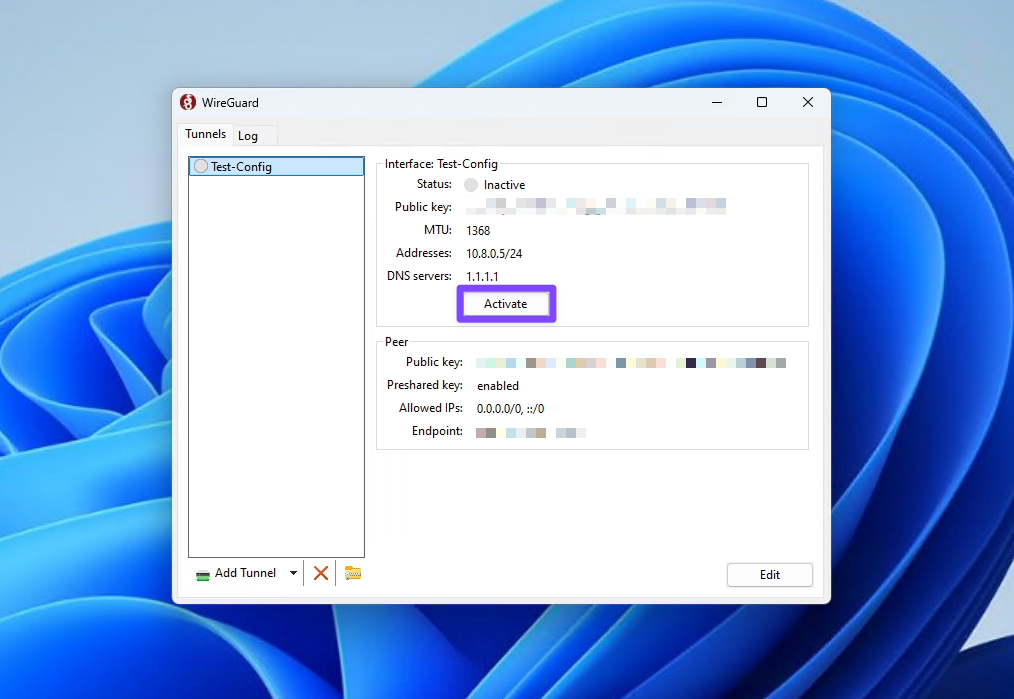
Congratulations!
All your network traffic is now protected and routed through the VPN tunnel.
macOS Installation
- Find and install the WireGuard client through the Mac App Store
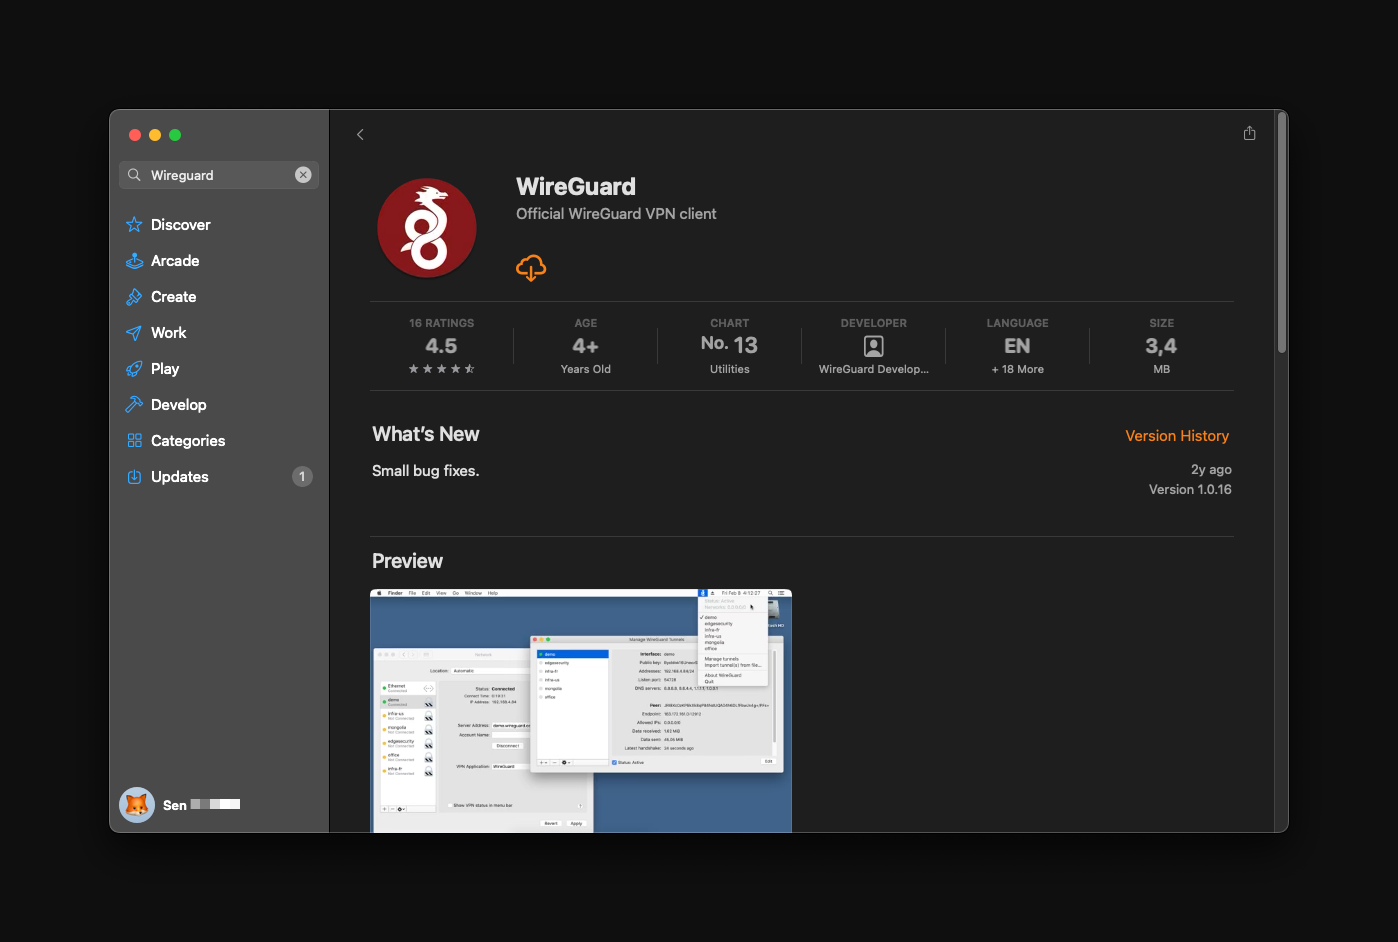
- Find and open the installed application

- Add your configuration to the program
On first launch, macOS will request permission to create VPN connections.
Make sure to click "Allow", otherwise the application won't function properly.
Activate the VPN connection.
Click the "Activate" button.
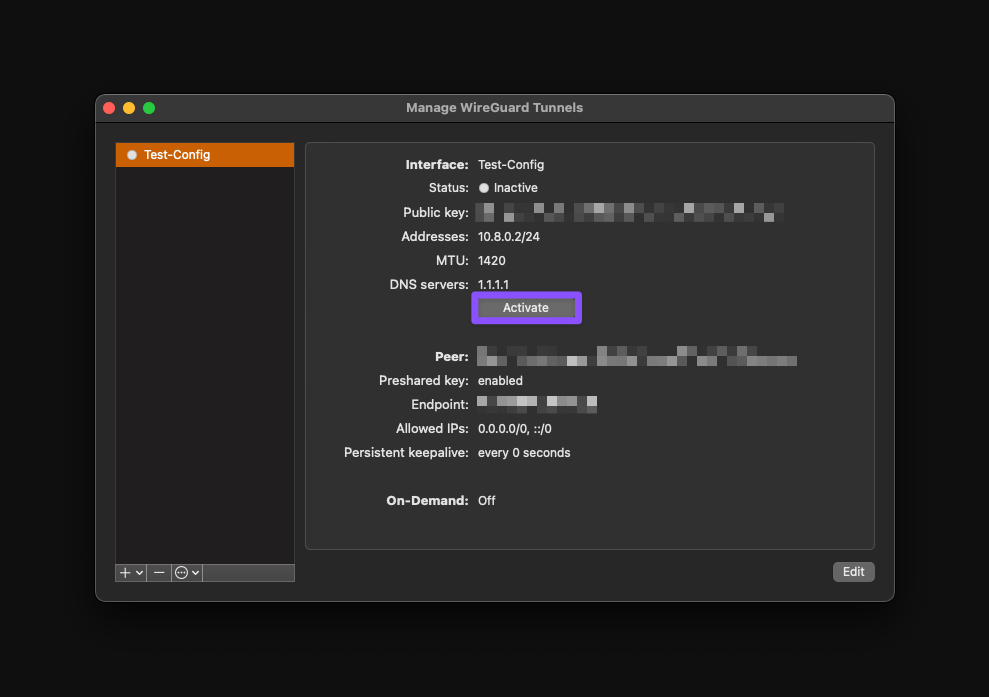
Great!
Your internet connection is now protected by the VPN tunnel.
Mobile Devices (Android/iOS)
- Download the official WireGuard app:
- For Android: Google Play Store
- For iOS: App Store
- Import the configuration file
- Activate the VPN connection in the app
Troubleshooting
Common Issues
Connection fails:
- Check if port 51820/udp is open in your firewall
- Verify the server's public IP address is correct
- Ensure IP forwarding is enabled
No internet access through VPN:
- Check iptables rules are applied correctly
- Verify the network interface name in the configuration
- Ensure masquerading is enabled
- Make sure there are no restrictions applied for the protocol on your Internet Service Provider's side
WireGuard service won't start:
- Check configuration file syntax:
wg-quick up wg0 - Verify file permissions are set correctly (600)
- Check system logs:
journalctl -u wg-quick@wg0
- Check configuration file syntax:
Useful Commands
# View detailed WireGuard status
wg show all

# Check WireGuard logs
journalctl -u wg-quick@wg0 -f

# Test configuration without starting
wg-quick up wg0 --dry-run

# Restart WireGuard
systemctl restart wg-quick@wg0
Network Debugging
# Check routing table
ip route show table all

# Monitor network traffic
tcpdump -i wg0

# Test connectivity
ping -I wg0 8.8.8.8
Security Considerations
- Keep private keys secure: Never share private keys and ensure they have proper file permissions (600)
- Regular key rotation: Consider rotating keys periodically for enhanced security
- Firewall rules: Only allow necessary traffic through your firewall
- Monitor connections: Regularly check connected clients with
wg show - Update regularly: Keep WireGuard and your system updated
Conclusion
You now have a fully functional WireGuard VPN server! The client configuration file can be imported into any WireGuard client application on various devices (Windows, macOS, iOS, Android, Linux) to establish a secure VPN connection to your server.
Remember to securely transfer the client configuration to your devices and keep your private keys safe.