
English
Installing MikroTik CHR on a Virtual Server

MikroTik Cloud Hosted Router (CHR) is a specialized version of RouterOS optimized for virtual machine environments that functions as a complete operating system.
In this guide, we'll walk you through the process of installing and configuring MikroTik CHR on your virtual server.
System Requirements
You can install MikroTik CHR on any of our virtual server plans, including the entry-level configuration with:
- 1 CPU core
- 1 GB RAM
- 10 GB NVMe storage
This guide demonstrates the manual installation process using a DE-BUDGET-1 virtual server.
Prerequisites
- Order a virtual server through your control panel or use an existing server.
- For this example, we'll use:
- Plan: DE-BUDGET-1
- Base OS: Ubuntu 26.04 (required for CHR deployment)
WARNING
Not all operating systems can be used to install CHR. Our tests showed that only Debian 12, Debian 13, and Ubuntu 26.04 work. Installing CHR on any other OS might result in errors during startup or operation. If you still wish to install CHR on an unlisted OS, we recommend trying an older version, specifically 6.49.20, or installing CHR from rescue mode.
Installing from a Working OS
WARNING
This option is not recommended. We strongly recommend performing the installation via rescue mode.
1. Server Setup
- Your server will be ready within 2 minutes after ordering
- Connect to the server using SSH credentials provided in your activation or OS reinstallation email
- For SSH connection guidance, refer to our How to connect to the server (Linux) guide
2. Downloading the CHR Image
- Visit the official MikroTik download page
- Download the Raw disk image version of CHR (we'll use version 7.20.8 in this example)
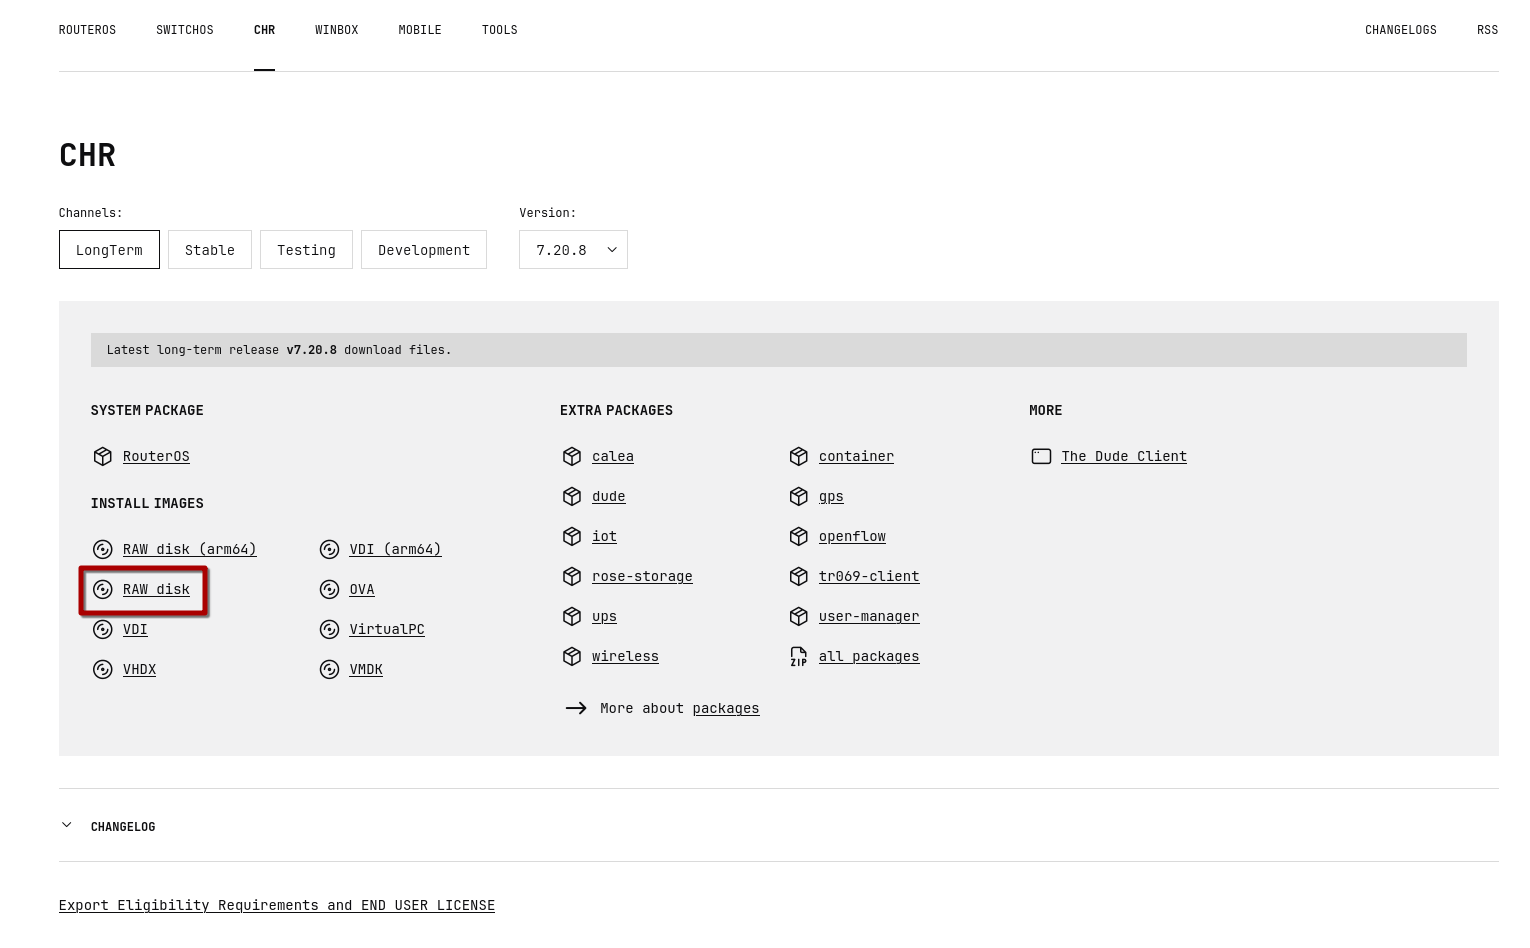
- Right-click the download icon and copy the download link (e.g., https://download.mikrotik.com/routeros/7.20.8/chr-7.20.8.img.zip)
- Download the image to your virtual server:
bash
cd /tmp
wget <LINK> -O chr.img.zip
For example:
bash
cd /tmp
wget https://download.mikrotik.com/routeros/7.20.8/chr-7.20.8.img.zip -O chr.img.zip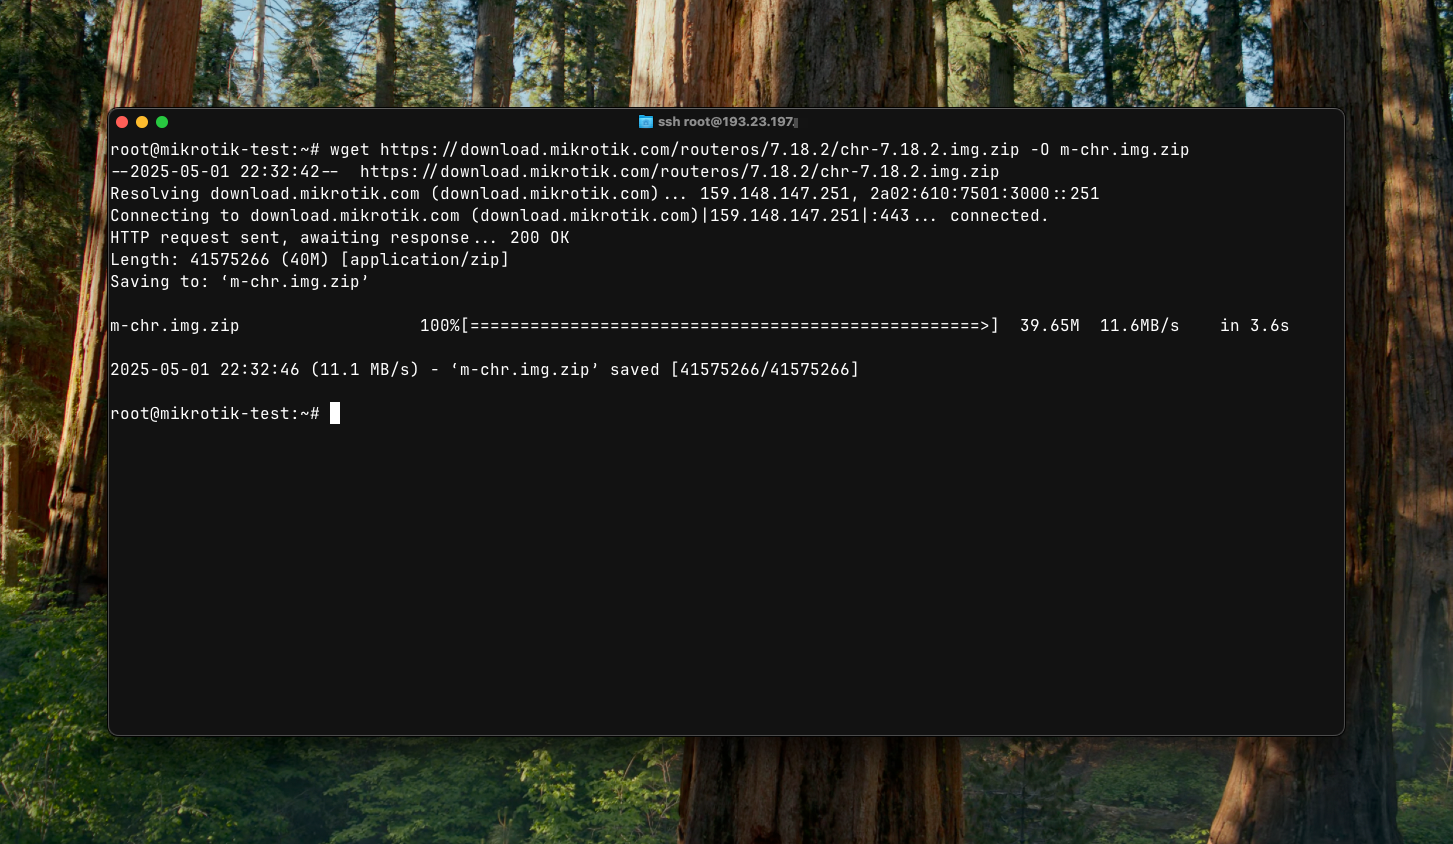
3. Image Deployment
WARNING
This process will delete all data from your server. Make sure to back up any important data before proceeding!
Refresh packages database and install unzip:
bash
apt update && apt install unzip -yExtract the downloaded image:
bash
unzip -p chr.img.zip > chr.imgSwitch the disk system to read-only mode:
bash
echo u > /proc/sysrq-triggerWrite the image to the virtual disk:
bash
dd if=chr.img of=/dev/vda bs=4M oflag=direct
echo s > /proc/sysrq-trigger
read -t 10 -u 1
Reboot the server to initialize CHR:
bash
echo 1 > /proc/sys/kernel/sysrq
echo b > /proc/sysrq-trigger
After executing the last command and pressing [Enter], your SSH connection may appear to hang - this is expected behavior.
You can safely disconnect from your virtual server at this point. The remaining setup will be performed through the web VNC interface. Please see Networking Configuration for further steps.
Installing from Rescue Mode
1. Server Setup
- Your server will be ready within 2 minutes after ordering
- Log in to your account in the VM control panel
- Enter rescue by following our guide
2. Downloading the CHR Image
- Visit the official MikroTik download page
- Download the Raw disk image version of CHR (we'll use version 7.20.8 in this example)
- Right-click the download icon and copy the download link (e.g., https://download.mikrotik.com/routeros/7.20.8/chr-7.20.8.img.zip)
- Download the image to your virtual server:
bash
cd /tmp
wget <LINK> -O chr.img.zip
For example:
bash
cd /tmp
wget https://download.mikrotik.com/routeros/7.20.8/chr-7.20.8.img.zip -O chr.img.zip
3. Image Deployment
WARNING
This process will delete all data from your server. Make sure to back up any important data before proceeding!
Extract the downloaded image:
bash
unzip -p chr.img.zip > chr.imgWrite the image to the virtual disk:
bash
dd if=chr.img of=/dev/vda bs=4M oflag=direct
sync
After the last command finishes, unmount the ISO and select the checkbox labelled "The OS has been reinstalled".
The remaining setup will be performed through the web VNC interface. Please see Networking Configuration for further steps.
Network Configuration
Now we need to access the VM control panel to connect to our server via VNC.
Accessing the System
- Log in to the VM control panel
- Select the server where you installed MikroTik CHR
- Connect to the server through the VNC console
- Default credentials:
- Username: admin
- Password: (leave empty)
System Setup
- Skip the software license agreement (press 'n')
- Set a new administrator password (minimum 8 characters recommended)
- Configure network settings using parameters from your control panel:
bash
/ip address add address=<IPv4>/32 network=<Gateway> broadcast=<IPv4> interface=ether1
/ip route add dst-address=0.0.0.0/0 gateway=<Gateway>
/ip dns set servers=1.1.1.1,1.0.0.1
Where:
<IPv4>is your server's IP address<Gateway>is typically172.16.0.1(for the RZ9 and EP lineups) or10.0.0.1(for the DE-BUDGET lineup)
You can verify your server's internet connectivity by running:
bash
ping 1.1.1.1If configured correctly, you should see replies from Cloudflare's DNS (1.1.1.1): 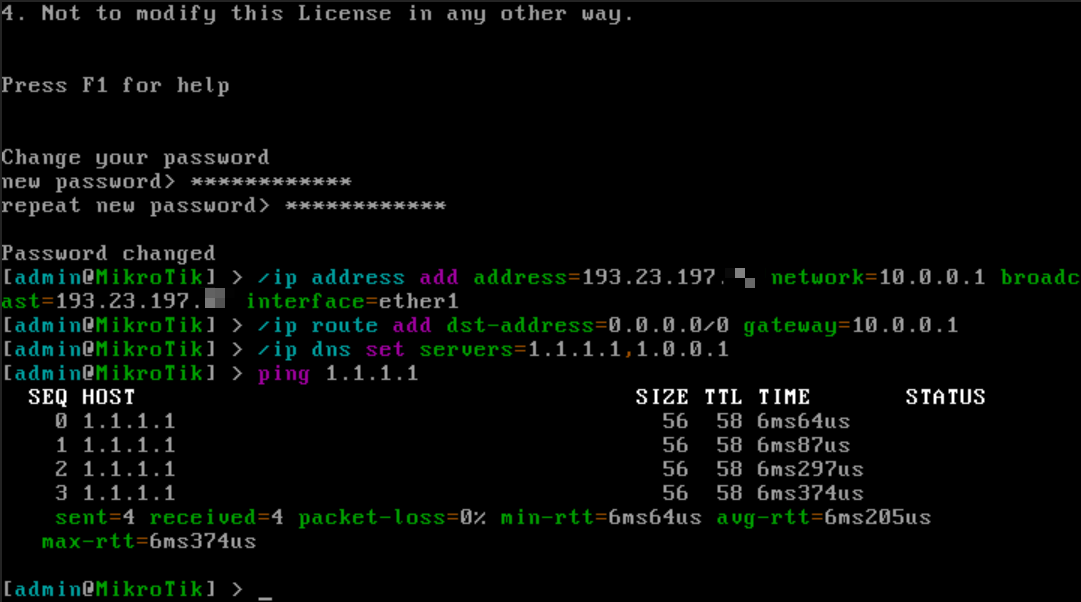
Your MikroTik CHR is now ready for further configuration and use. You can now connect via SSH as well.
Additional Configuration
Creating a New User
For enhanced security, we recommend creating a new user and removing the default admin user.
Create a new user by running:
bash
user/add name=usernameWhere username is your desired login name.
The system will prompt you to:
- Assign a group - type
full - Set a password - use at least 8 unique characters
Removing the Admin User
After creating your new user:
- Log out of the current session:
bash
/quit- Log in with your new credentials via SSH or VNC
- Remove the admin user:
bash
user/remove adminSecuring Services
By default, MikroTik runs several services on various ports, including:
- Telnet
- FTP
- HTTP server
- SSH
- API
- Winbox
- SSL API
These services may expose your server to security risks, as malicious bots often attempt to brute-force routers on the internet.
To check currently running services:
bash
ip/service/print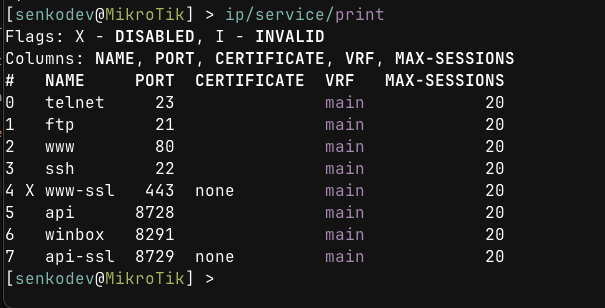
Disable unused services:
bash
ip/service/disable n,n,n,nWhere n represents the service number to disable.
Examples:
bash
ip/service/disable 0,1,2,5,7  # Disables Telnet, FTP, HTTP, API, and SSL API
ip/service/disable 3          # Disables SSH only
ip/service/disable 5,7        # Disables API and SSL API only
ip/service/disable 1          # Disables FTP only
Changing SSH Port
For additional security, change your SSH port to a non-standard number (e.g., 59871):
bash
set 3 port=PORTWhere PORT is your preferred port number.
Example:
bash
set 3 port=59871License Information
Check your MikroTik CHR license status:
bash
/system/license/printCHR offers four license levels:
- free: 1 Mbps speed (default)
- p1 (perpetual-1): $45, 1 Gbit speed
- p10 (perpetual-10): $95, 10 Gbit speed
- p-unlimited (perpetual-unlimited): $250, Unlimited speed
The default free license allows indefinite use but limits throughput to 1 Mbps per interface.
For more information about licensing, visit the official MikroTik documentation.
Resolving Startup Errors
Most startup errors, such as XZ-compressed data is corrupt, opendir: No such file or directory, or No valid harddrives found, can be resolved by taking one of the following actions:
- Reinstall the server with one of the operating systems listed in the prerequisites (Debian 12, Debian 13, or Ubuntu 26.04).
- Install an older version of CHR (for example, the previously mentioned version
6.49.20). - Install CHR from rescue mode.