
English
Working with Rescue Mode
Booting into Rescue Mode
You can boot your server into rescue mode in two ways:
Using "Recovery Mode"
- Log in to your account in the VM control panel.
- Select the server on which you want to enable recovery mode.
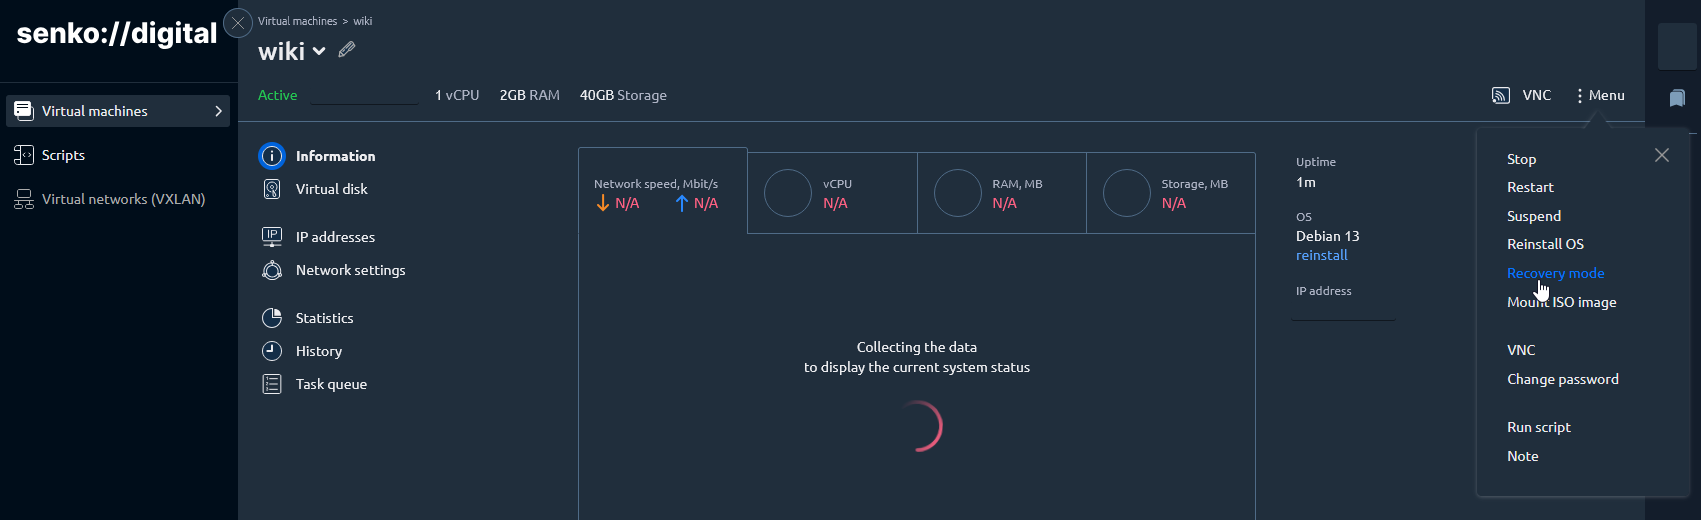
- Click the three-dot menu in the server list or on the server's parameters page, then select "Recovery mode".
- Click the "Start mode and reboot" button.
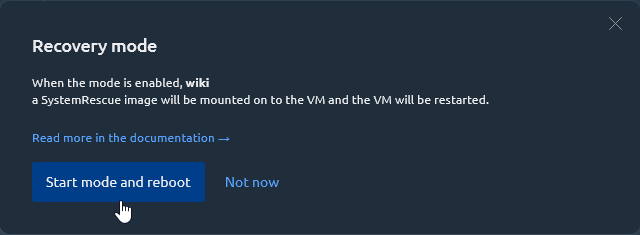
After your VM's status changes to "Active", connect to your server via VNC.
To set up networking, please refer to the SystemRescue networking guide.
Using an ISO image
- Log in to your account in the VM control panel.
- Select the server on which you want to mount the ISO file.
- Click the three-dot menu in the server list or on the server's parameters page, then select "Mount ISO image".
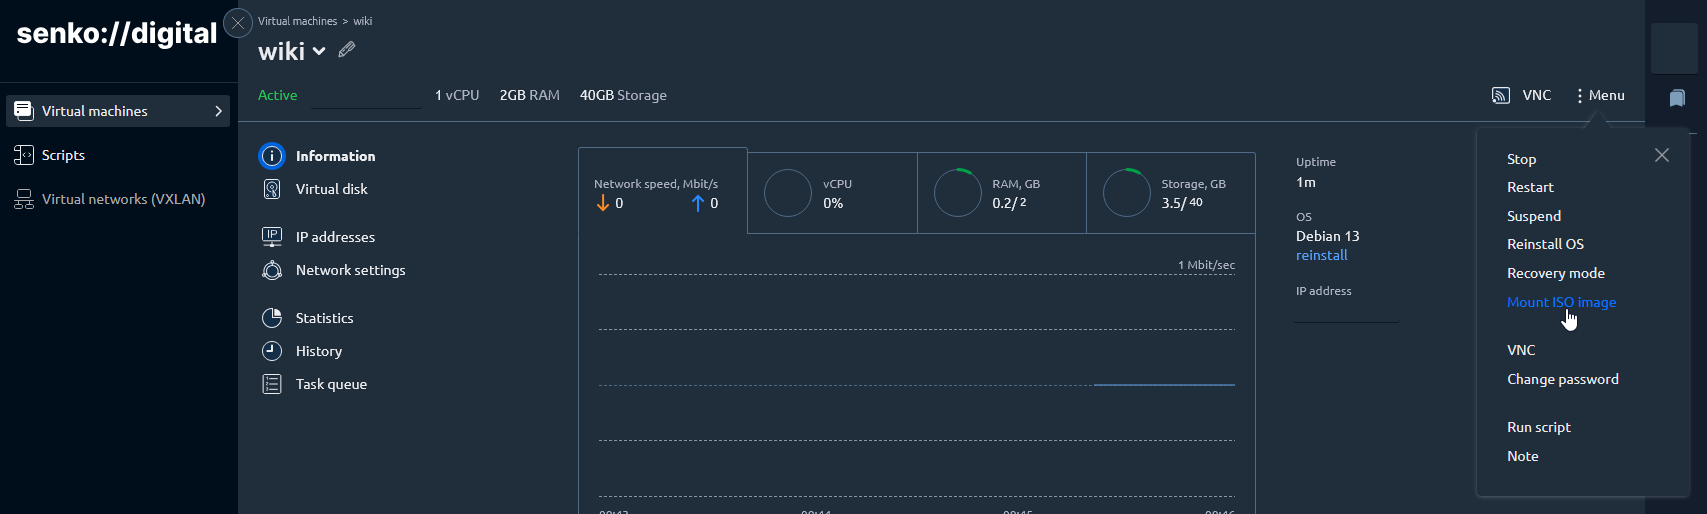
- Change the loading method from "Local file" to "Image URL".
- Copy the download link for GRML or SystemRescue from its respective download page.
- Paste the download link for one of the ISO files into the "Image URL" field. For example:
- GRML:
https://download.grml.org/grml-full-2026.04-amd64.iso - SystemRescue:
https://fastly-cdn.system-rescue.org/releases/13.01/systemrescue-13.01-amd64.iso - An image of your choice
- Click "Upload image".
WARNING
Take note of which distribution you choose, as it determines how you configure networking. If you choose a distribution that is not listed above, consult its documentation for the correct network configuration procedure.
After your VM's status changes to "Active", connect to your server via VNC.
To configure networking, refer to the guide for your selected distribution: SystemRescue or GRML.
Configuring Networking
SystemRescue
SystemRescue networking is configured through the NetworkManager CLI. Before configuring it, obtain your VM's network settings from the "IP addresses" menu in the VM control panel. You will need:
- IP address
- Gateway
After obtaining this information, run the following commands:
1. Set Up the IP Address
bash
nmcli conn mod "Wired connection 1" ipv4.addr <IP>/32Replace <IP> with your server's IP address.
2. Disable DHCP
bash
nmcli conn mod "Wired connection 1" ipv4.method manual3. Set Up the Gateway
bash
nmcli conn mod "Wired connection 1" ipv4.gateway <GATEWAY>Replace <GATEWAY> with your server's gateway (usually either 172.16.0.1 or 10.0.0.1).
4. Set Up DNS
bash
nmcli conn mod "Wired connection 1" ipv4.dns 1.1.1.15. Enable the interface
bash
nmcli conn up "Wired connection 1"6. Enable the SSH Server
bash
systemctl enable ssh --nowYou can then configure the firewall to allow incoming SSH connections to your server.
GRML
You can configure networking with the grml-networking utility. Launch it by running grml-networking or by pressing n after the initial startup. Before configuring it, obtain your VM's network settings from the "IP addresses" menu in the VM control panel. You will need:
- IP address
- Mask
- Gateway
After launching the utility:
- Select
netcardconfigand press[Enter]. - When asked to configure VLAN, select
No. - When asked whether to use DHCP broadcast, select
No. - Enter your server's IP address and press
[Enter]. - Enter your server's network mask (usually
255.255.255.255) and press[Enter]. - Leave the broadcast address empty. If your IP address is present, remove it, then press
[Enter]. - Enter your server's gateway (usually either
172.16.0.1or10.0.0.1) and press[Enter]. - Enter
1.1.1.1as the DNS server. You may use another DNS server instead. Then press[Enter]. - When asked whether to enable the interface automatically at boot, select either
YesorNo.
You will then return to the initial menu. Select Quit, and press q when the welcome message appears.
Configuring the Firewall
1. Flush Existing Rules
bash
iptables -F2. Allow Traffic from Established and Related Connections
bash
iptables -I INPUT -m conntrack --ctstate ESTABLISHED,RELATED -j ACCEPT3. Allow All Incoming SSH Connections
bash
iptables -I INPUT -p tcp --dport 22 -j ACCEPT4. Allow Loopback Traffic
bash
iptables -I INPUT -i lo -j ACCEPTEnabling the SSH Server
To connect to your server via SSH, you must set a password for the root user and start the SSH service.
First, set a password for the root user:
bash
passwd rootThen start the SSH server:
bash
systemctl start sshYou should now be able to connect to your server using the password you set.
Using Rescue Mode
This section covers common operations performed in rescue mode.
Accessing Data on the Server's Disk
WARNING
If you need to download or upload files, configure networking, configure the firewall, and enable the SSH server before continuing.
1. Find the Server's Disk
First, identify your server's disk by running:
bash
lsblk -fIdentify the partition containing your server's data. Its FSTYPE should be ext4: 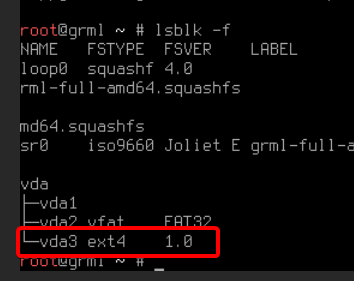
2. Create a Mount Point and Mount the Disk
Create the mount point:
bash
mkdir -p /mnt/vmThen mount the partition:
bash
mount /dev/vda3 /mnt/vmVerify that the partition was mounted correctly:
bash
ls /mnt/vmFor a Linux root filesystem, you would typically see directories such as: 
You can then connect to your server with an SFTP client (for example, WinSCP) using your SSH credentials and edit or download files from your server's disk.